
Staff roles and permissions
Not every teammate needs to see every client file or change your pricing. Revively starts you with a role template, then lets you narrow what someone sees and tick individual permissions where the template is not quite right.
Access lives on each staff member, not in Settings. Open Staff in the sidebar, click the person's row, then choose Edit on the Access card. The staff page header and the Access column on the staff list both show the current template, with a Custom pill when someone has per-permission overrides.
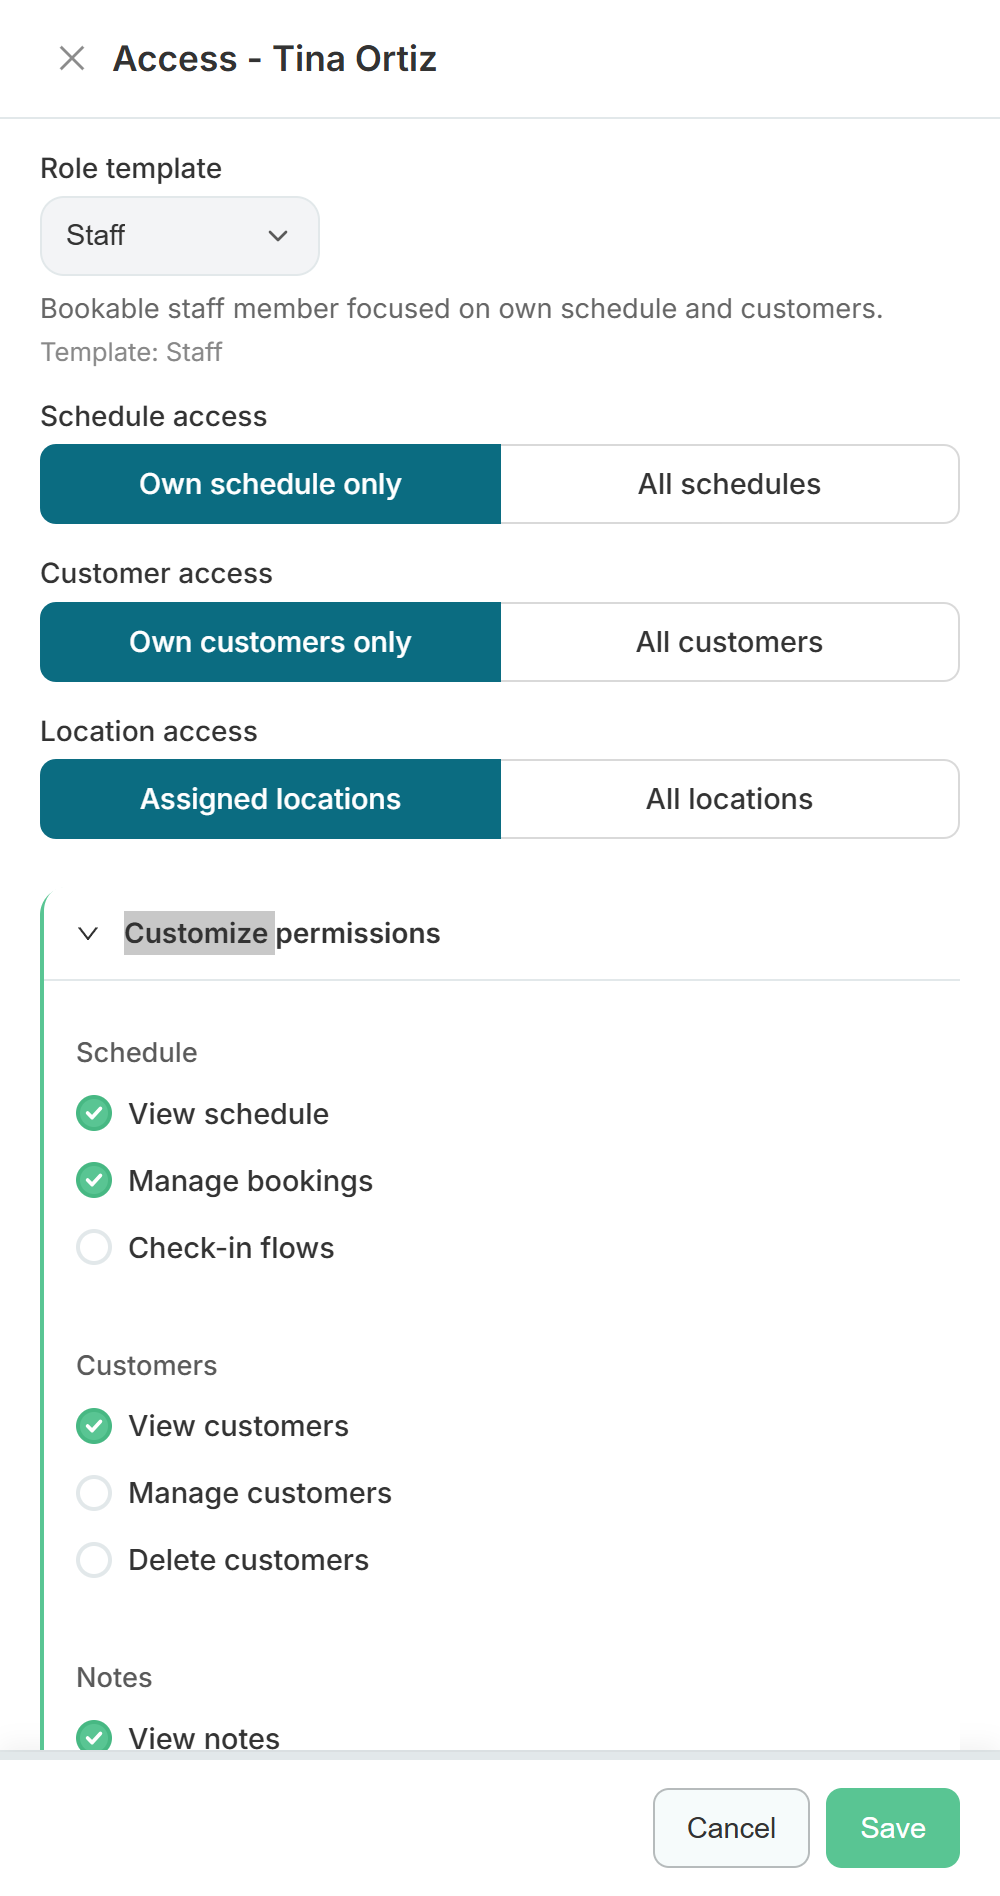
Step 1 - Pick a role template
The template is the starting point, not a cage.
| Template | Built for |
|---|---|
| Owner | Full workspace access including billing and permission administration |
| Manager | Operational leadership - reports, roster, and settings, without SaaS billing |
| Front desk | Reception and check-in across assigned locations |
| Staff | Bookable therapists, coaches, and instructors focused on their own schedule and customers |
| Viewer | Read-only access across the workspace for demos and audits |
| Cover staff | Temporary or substitute instructors, limited to their covered sessions and check-in |
Choosing a template fills in a sensible set of permissions immediately. The description under the picker tells you what that template assumes.
You cannot change your own owner access - the drawer locks and tells you to ask another owner. Cover staff is also not a normal pick: convert someone with Make Cover staff / Make team in the staff page Quick Actions instead.
Step 2 - Set the access scopes
Three scopes decide how much of the business a person sees. These matter more than any individual tick box.
- Schedule access - Own schedule only or All schedules. A coach who should not browse a colleague's day stays on own-only.
- Customer access - Own customers only or All customers. Own-only limits them to clients they are actually assigned to.
- Location access - Assigned locations or All locations. On multi-site accounts, keep casual staff to the site they work at.
For a single-location studio where everyone covers everyone, All schedules and All customers is usually the honest answer. For a clinic or a shared-space business, tighten them.
Step 3 - Customise individual permissions
Expand Customize permissions when someone needs a little more or less than their template. Permissions are grouped by area, for example:
- Schedule - view schedule, manage bookings, check-in flows
- Customers - view, manage, delete, give and adjust customer credit (manual goodwill grants and clawbacks on the Account credit tab; separate from top-up invoices and checkout spend)
- Notes - view and write customer notes
- Plus invoices, catalog, staff, reports, metrics, tasks, and settings
A common example: a senior instructor on the Staff template who also runs the front desk on Saturdays gets check-in flows ticked on, and nothing else changes.
Save when you are done. Changes apply the next time that person signs in.
Bookable is not a permission
Bookable for appointments is a separate switch, on Personal details → Edit. It controls whether someone appears on the schedule and online booking - and whether they use a paid staff seat. Front desk, ops, and management can have full dashboard access with bookable turned off. See invite your team.
When someone leaves
Open their staff page and use Deactivate staff member at the bottom of the Overview tab. That archives the profile, revokes dashboard login, and cancels pending invites while keeping bookings, notes, and history for reporting. If they still have upcoming appointments, choose whether to unassign or cancel them in the drawer.
Reactivate from the same card if they return for a season or on contract. Send a fresh dashboard invite if they need to sign in again.